For flexographic printers, especially those focused on narrow web applications like label printing, embracing advanced curing technologies is key to enhancing efficiency, improving print quality, and expanding service offerings. UV LED curing systems represent a significant leap forward from traditional UV lamp technology and mercury vapor lamps. Their adoption in flexographic printing can lead to substantial benefits, including reduced energy consumption, lower heat generation, instant on/off capability, and a longer lifespan.
This guide provides a comprehensive, step-by-step approach to installing UV LED systems on your flexographic printing presses, ensuring a smooth transition and optimal performance. We will cover considerations specific to label printing, narrow web presses, and the core principles of UV curing.
Understanding UV LED Curing in Flexography
Before diving into the installation process, it’s important to grasp what UV LED curing entails and why it’s advantageous for flexographic printing. Unlike broadband UV lamps that emit a wide spectrum of UV light and heat, UV LEDs emit light at specific wavelengths. This targeted emission is highly efficient for polymerizing UV-curable inks, coatings, and adhesives.
For label printers and narrow web operations, this translates to:
- Faster Cure Speeds: Achieve full cure faster, allowing for higher press speeds and increased throughput.
- Substrate Compatibility: Lower heat output means a wider range of heat-sensitive substrates, such as thin films and plastics, can be printed without distortion or damage.
- Energy Savings: UV LEDs consume significantly less energy than traditional UV lamps.
- Instant On/Off: LEDs reach full intensity immediately, eliminating warm-up times and reducing wasted energy when the press is stopped.
- Longer Lifespan: LED modules last much longer than conventional UV lamps, reducing maintenance costs and downtime.
- Environmental Benefits: Reduced energy use and elimination of mercury (found in some traditional lamps) contribute to a greener printing process.
Pre-Installation Assessment and Planning
Thorough preparation is paramount for a successful UV LED system installation. This phase involves assessing your current flexographic press, understanding its limitations, and planning the integration of the new system.
1. Press Compatibility and Requirements
Not all flexographic presses are designed to accommodate UV LED systems without modifications. Key areas to assess include:
- Existing Curing Stations: Determine if your current press has space for new curing units. Older presses may require significant structural adjustments or the removal of old curing equipment.
- Web Path and Tension: The UV LED curing unit must be integrated into the web path without causing excessive tension or deviation. Ensure there is adequate clearance between printing units and the new curing station.
- Power Supply and Electrical Requirements: UV LED systems have specific electrical demands. You’ll need to verify that your press’s electrical infrastructure can support the new system’s power requirements. Consult the manufacturer’s specifications for both your press and the UV LED system.
- Cooling System: While UV LEDs generate less heat than traditional UV, they still produce some thermal energy. Assess if your press has an adequate cooling system or if an auxiliary cooling solution is needed, especially for high-speed or long-run jobs.
2. UV LED System Selection
Choosing the right UV LED system is crucial. Consider these factors:
- Wavelength: Common wavelengths for UV LED curing are 365 nm, 385 nm, 395 nm, and 405 nm. The choice depends on the specific inks, coatings, and adhesives you plan to use. Consult with your ink and coating suppliers for recommendations.
- Irradiance and Dose: These are critical performance metrics. Irradiance (measured in W/cm²) is the power density of the UV light, while Dose (measured in mJ/cm²) is the total energy delivered over time. Ensure the system provides sufficient irradiance and dose for your application and desired cure speeds.
- Cooling Method: UV LED systems are typically air-cooled or water-cooled. Water-cooled systems are generally preferred for high-performance applications as they offer more efficient heat dissipation, leading to more stable performance and longer LED lifespan.
- Physical Dimensions and Mounting: Measure the available space on your press accurately. The physical size and mounting options of the UV LED system must be compatible with your press’s design.
- Manufacturer Support and Warranty: Opt for reputable manufacturers who offer strong technical support, installation assistance, and warranty coverage.
3. Safety Considerations
Safety is paramount when working with UV light and electrical equipment.
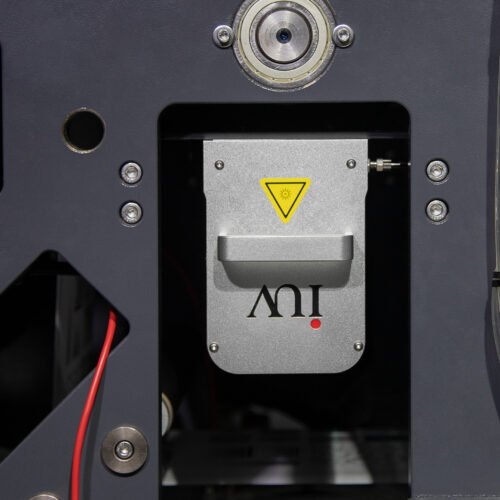
- UV Shielding: UV light is harmful to skin and eyes. The installed system must have adequate shielding to prevent exposure.
- Electrical Safety: Ensure all electrical connections are made by qualified personnel and comply with local electrical codes.
- Interlocks: Install safety interlocks that automatically shut down the UV LED system if guards or access panels are opened.
- Ventilation: Even with reduced heat, proper ventilation around the press is advisable.
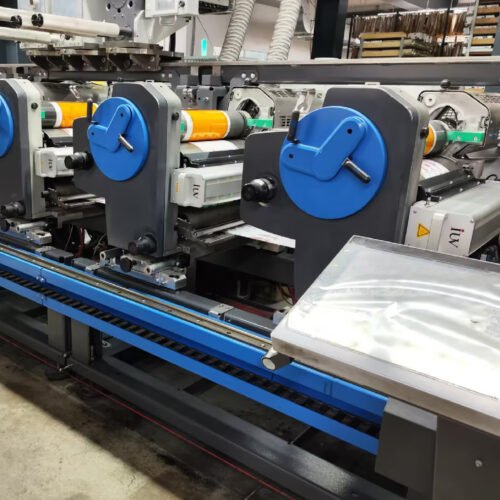
Step-by-Step Installation Process
Once planning and procurement are complete, the physical installation can begin. It’s often recommended to have a technician from the UV LED system manufacturer present or to follow their detailed installation manual meticulously.
Step 1: Preparing the Press and Work Area
- Cleanliness: Ensure the area around the installation point on the press is clean and free of debris.
- Access: Make sure there is sufficient access to the press for tools, equipment, and personnel.
- Power Disconnection: Crucially, disconnect all power to the flexographic press before commencing any work.
Step 2: Removing Existing Curing Equipment (If Applicable)
If you are replacing older UV curing systems, this step is necessary.
- Disconnect Power: Ensure the old system is completely de-energized.
- Disassembly: Carefully disassemble the old curing unit, taking care not to damage the press structure.
- Cable Management: Remove old wiring and conduits.
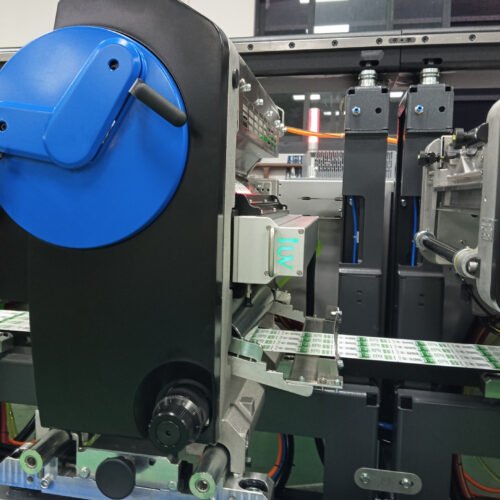
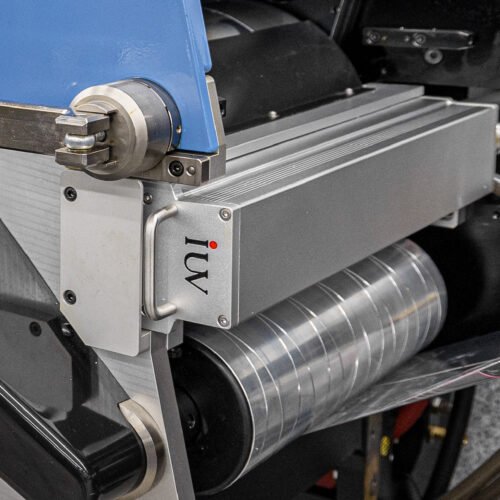
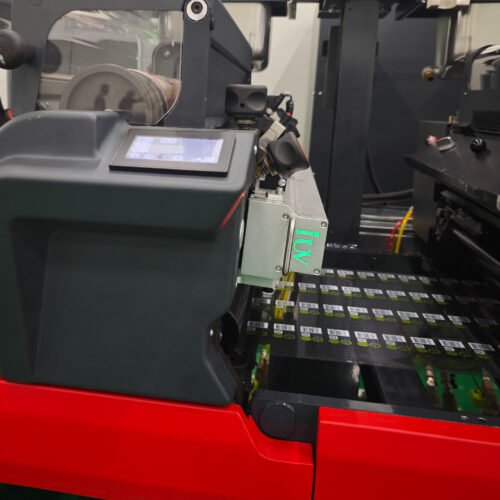
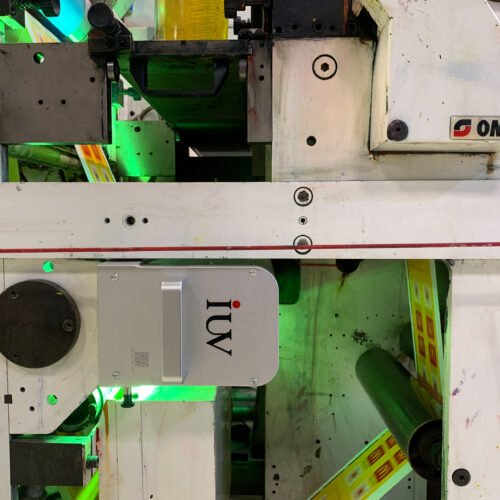
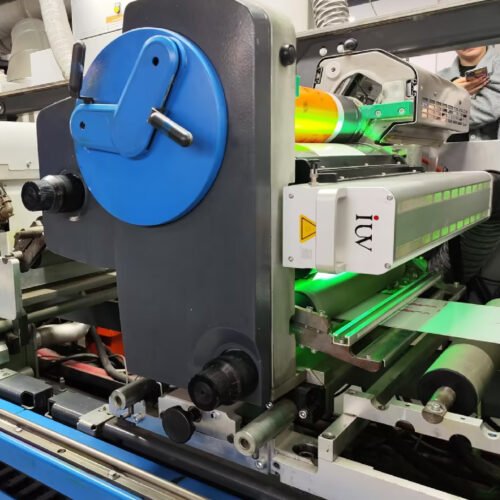
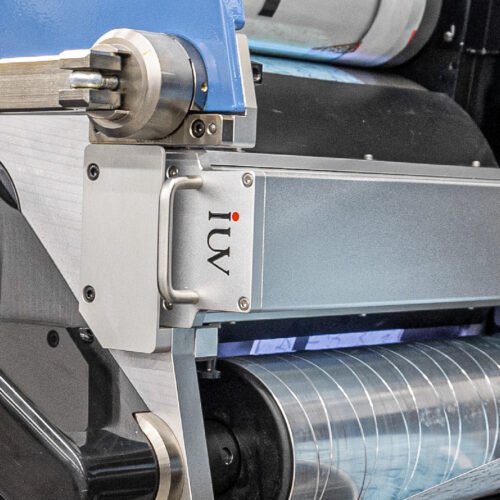
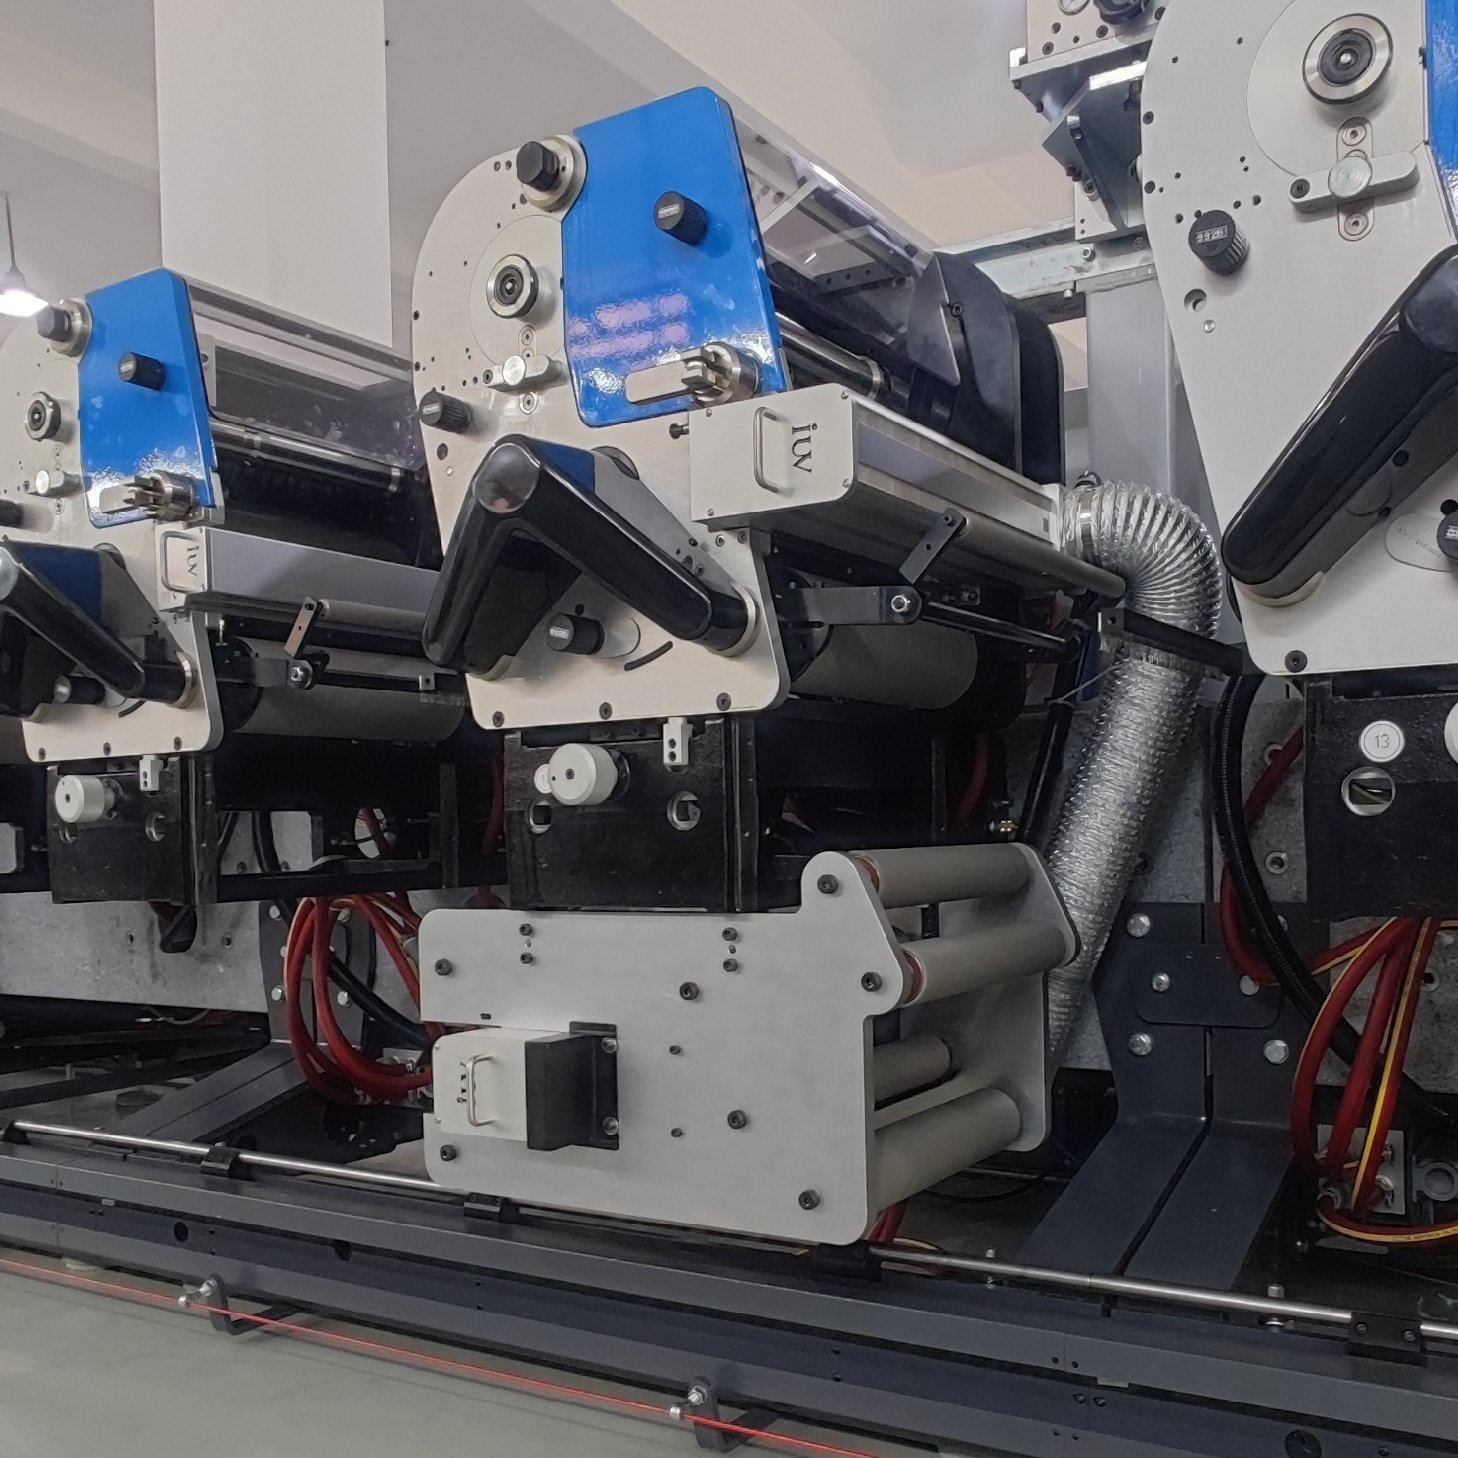
Step 3: Mounting the UV LED Curing Unit
This is where the new system is physically attached to the press.
- Positioning: Carefully position the UV LED curing unit according to the manufacturer’s instructions and your planned web path.
- Securing: Use the provided mounting hardware to securely attach the unit to the press frame. Ensure it is level and stable.
- Alignment: Precise alignment is critical. The UV LED array should be positioned directly over the print or coating station to ensure uniform exposure across the substrate. Minor adjustments may be needed to achieve perfect alignment with the printing cylinder or die.
Step 4: Electrical Connections
This is a critical phase requiring precision and adherence to safety standards.
- Power Supply: Connect the UV LED system to the designated power source. This may involve installing new circuit breakers or tapping into existing power lines as per the manufacturer’s specifications.
- Control Wiring: Connect the system’s control unit to the press controls. This allows for integration with press functions like speed synchronization and on/off commands.
- Grounding: Ensure proper grounding of the entire system to prevent electrical hazards.
- Cable Management: Route all cables neatly and securely, away from moving parts and heat sources, using appropriate conduits and cable ties.
Step 5: Cooling System Integration (If Water-Cooled)
For water-cooled systems, integration is essential for longevity and performance.
- Connect Plumbing: Connect the water lines from the chiller unit to the UV LED curing heads. Ensure all connections are leak-free.
- Chiller Placement: Position the chiller unit in a suitable location, typically near the press, with adequate ventilation.
- Circulation Check: Once connected, carefully check the water circulation and ensure there are no blockages or leaks.
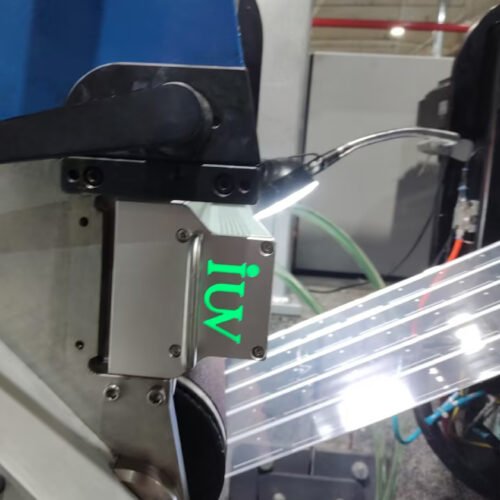
Step 6: Installing Safety Features
- Shielding: Ensure all UV-blocking shields are correctly installed and sealed to prevent light leakage.
- Interlocks: Verify that all safety interlocks are properly wired and functioning. Test them by opening access panels with the system powered up (if safe to do so, following manufacturer guidance).
Step 7: System Testing and Calibration
This is a crucial step to verify proper operation and tune performance.
- Initial Power-Up: With all connections verified, power up the press and the UV LED system.
- Functional Checks: Test basic functions: on/off, intensity control, and synchronization with press speed.
- Irradiance Measurement: Use a calibrated radiometer to measure the UV irradiance at the substrate level. This is vital for ensuring adequate curing. Adjust the system’s output to meet the required levels.
- Dose Calculation: Based on measured irradiance and press speed, calculate the delivered UV dose. Fine-tune settings to achieve the target dose for your specific inks and substrates.
- Test Prints: Run test prints using your standard inks and substrates. Check for complete cure, adhesion, rub resistance, and any signs of overheating or distortion.
Post-Installation and Optimization
Once the UV LED system is installed and tested, ongoing monitoring and optimization are key to maximizing its benefits.
1. Operator Training
Proper training for press operators is essential. They need to understand:
- How to operate the UV LED system controls.
- The importance of safety features.
- Basic troubleshooting steps.
- How to recognize signs of inadequate curing.
2. Regular Maintenance
UV LED systems require less maintenance than traditional UV lamps, but regular checks are still necessary:
- Cleaning: Keep the LED heads and optics clean to ensure maximum light transmission.
- Cooling System: For water-cooled systems, monitor coolant levels and quality.
- Connections: Periodically check electrical and plumbing connections for signs of wear or leakage.
3. Process Optimization
- Ink and Coating Compatibility: Continuously work with your ink and coating suppliers to leverage the full capabilities of UV LED curing. New formulations are constantly emerging.
- Speed and Efficiency: Experiment with press speeds and UV output settings to find the optimal balance between throughput and cure quality for different jobs.
By following this detailed step-by-step guide, flexographic printers, particularly those in the label printing and narrow web sectors, can successfully integrate UV LED systems. This investment promises enhanced operational efficiency, superior print quality, and a competitive edge in the ever-evolving printing market.