Alright, let’s dive into the nitty-gritty of keeping those LED UV curing systems humming along smoothly! As a seasoned print engineer with a serious knack for SEO, I’ve seen my fair share of hiccups. And let’s be honest, when your UV curing system acts up, it can throw a wrench in the whole operation, especially in demanding sectors like label printing, flexo, offset, and narrow-web.
So, we’re going to tackle “Troubleshooting Common Issues in LED Curing System Operation” head-on. My goal is to give you actionable advice, keep it clear, and make sure it ranks well. Think of this as your go-to guide for getting those presses back to producing perfect prints.
One of the most frequent headaches? Inconsistent Curing. You’re running a batch of labels, everything looks great, then suddenly, the ink just isn’t fully curing. The first place to look is your LED arrays. Are they clean? Over time, ink mist and dust can build up. This film acts like a tiny shield, blocking those powerful UV rays from reaching the ink. A gentle wipe with a lint-free cloth and some isopropyl alcohol usually does the trick.
Next, consider power output. Your LED system has a specific power setting for a reason. If it’s too low, you won’t get full cure. If it’s too high, you risk damaging the substrate or over-curing the ink, which can lead to brittleness. Check your settings against the ink manufacturer’s recommendations. Also, verify the power supply is delivering the correct voltage. Fluctuations here are a common culprit for inconsistent results.
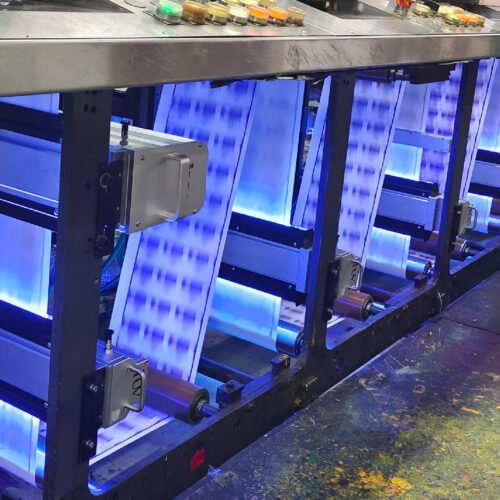
Another common issue is uneven curing across the web. This often points to problems with the LED lamp alignment or uniformity. Are all the LEDs in the array firing at full intensity? Sometimes, individual LEDs can degrade over time. Regular maintenance checks should include verifying uniform light output. If you notice dark spots or dim areas, it might be time to inspect or even replace specific LED modules.
Overheating is a concern for any high-intensity system. If your LED curing system seems to be running hotter than usual, it can affect both the longevity of the LEDs and the quality of the cure. Ensure your cooling system is functioning properly. This means checking fans, ensuring vents are clear of debris, and verifying coolant levels if it’s a water-cooled system. Excessive heat can also be caused by running the system at peak power for extended periods without adequate ventilation.
Now, let’s talk about ink adhesion problems. Even if the ink looks cured, poor adhesion means it’s not properly cross-linking. This is often an issue with the interaction between the LED wavelength and the ink formulation. Not all UV inks are created equal, and their response to specific LED wavelengths can vary. Are you using an LED-specific ink? If not, you might be chasing ghosts. Ensure your ink is designed for LED curing and that the LED wavelength matches the ink’s photoinitiators.
Substrate issues can also contribute to curing problems. Some substrates absorb UV light more than others. If you’ve switched to a new material or a different coating, it might require a higher UV dose or a different wavelength for optimal curing. Think about it: a clear, non-absorbent substrate will allow more UV light to reach the ink than a heavily pigmented or treated one.
For flexographic and narrow-web printers, managing web speed is critical. The faster you run, the less exposure time the ink has to the UV light. If you’ve increased your press speed, you’ll likely need to increase the UV intensity or reduce the web speed to compensate. It’s a delicate balance, and often requires careful testing to find the sweet spot for your specific job.
In offset printing, particularly with sheetfed, ensuring consistent placement and coverage of the UV coating or ink is key. If you’re seeing pinholes or incomplete cure in certain areas, it could be an issue with the coating transfer or the pressure being applied. While the LED curing system itself might be fine, the upstream process is impacting the final cure.
Error codes or system alerts are your system’s way of telling you something is wrong. Don’t ignore them! Consult your system’s manual immediately. These codes are specific and designed to pinpoint the problem area, whether it’s a faulty sensor, a communication error between components, or a temperature excursion.
Let’s not forget startup and shutdown procedures. Improperly shutting down the system can sometimes leave components in a suboptimal state. Always follow the manufacturer’s recommended sequence. This helps protect the LEDs and other sensitive parts from thermal shock or premature wear.
Finally, preventive maintenance is your best friend. Regularly scheduled checks, cleaning, and calibration can catch many of these issues before they become major problems. It’s far more cost-effective to spend a little time on maintenance than to deal with downtime and waste. This includes checking lamp power, cleaning optics, inspecting connections, and verifying cooling system performance.
By systematically approaching these common issues, you can minimize downtime and ensure your LED UV curing systems operate at peak performance, delivering those high-quality prints you and your customers expect.